Thompson Royal-Craft Royal Deluxe Restoration Tips

Questions/concerns/issues. How did the other guy do it? Find out here.

Moderators: a j r, TDockside, Miles, Moderators

Richp
Posts: 13
Joined: Wed May 30, 2007 5:24 am
Location: Sterling, MI
Contact:

Thompson Royal-Craft Royal Deluxe Restoration Tips

Post by Richp »

Hello, I have just started restoring my Royal-Craft Royal Deluxe 15. I would appreciate any suggestions and
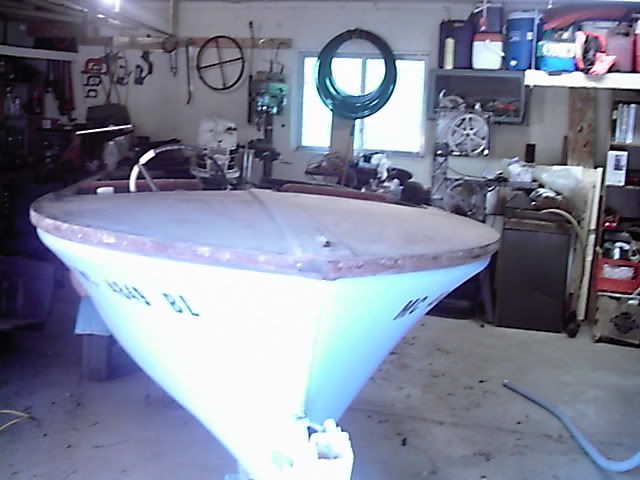
Tips before I get to far into it. This is my first boat restoration project. Most of the wood is solid. There is some
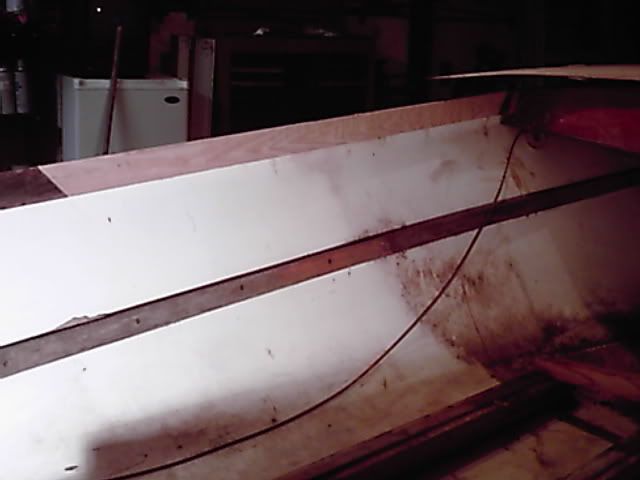
rot on the port side top (a filler board that runs from the keel to the bow.
The damage runs about 20". My plan is to cut out the wood past the rot about
30" and replace it. Is this a good idea? Or should I replace it the whole length?
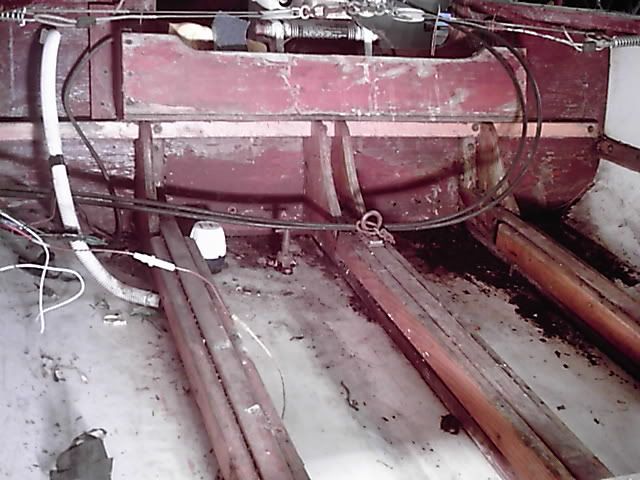
Also on the backside of the transom plywood there is a small about 1" bit of rot on the top behind where the rub rail mounts, the rest of the transom seems solid. Any suggestions?

I do not want to disassemble to much of the structural components of the boat if I don't have to. I am worried about the royalite material bowing.
I guess what I am saying is I'd like to be as careful as possible around the
Royalite hull.

Image

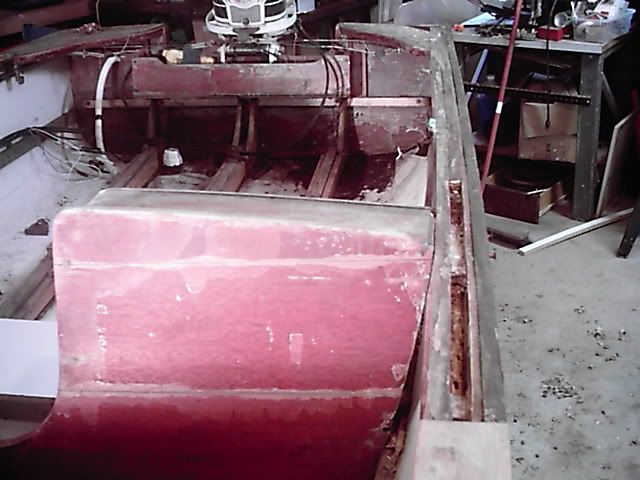
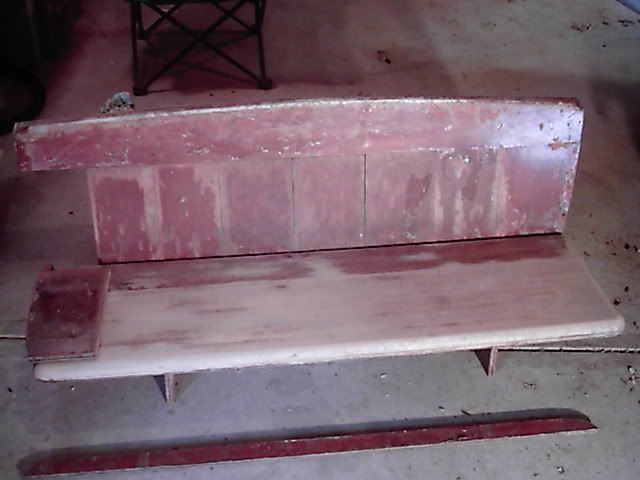
The seats are also splitting at the glue joints. And the back seat has some warped boards at the glue joints.

Image

I have many questions on this project such as stains, varnish and ext.

But I will start with the rot problems. And seat repair tips.

Thanks in advance!!
Rich

Image
a j r
Posts: 661
Joined: Sat Jan 07, 2006 3:09 pm

Post by a j r »

Welcome aboard! How fun to see a Thompson Royal-Craft boat with the rubber royalite material!!!

For the seats, I would disassemble all of it, clean it, strip the finish, seal the wood, reassmble (replace any bad wood), and ultimately refinsih.

I am not certain what you mean about the wood piece that goes from the keel to the bow??? Is this the stem?? Or do you mean the gunwale as shown in your picture??? If it's the gunwale as in the picture, her's what I suggest. Remove the bad wood and go beyond it as you mentioned. Cut an angled scarf into the good existing wood at each end. Fit a new piece of wood with scarf joints to match the existing where you cut teh scarfs. Glue and screw it together. Use decay resisatnt species such as all heartwood white oak or mahogany.

Get rid of the rooten wood in the transom. Replace it.

Since I have never seen one of these boats in person, I really cannot be very helpful with my suggestions.

Andreas
email: thompsonboat@msn.com
Image
JoeCB
Posts: 241
Joined: Fri Dec 30, 2005 5:17 pm
Location: Farmington Hills , MI

Post by JoeCB »

Welcome aboard Rich, Well your boat must be pretty special if Andreas admits to not ever having seen one before. It sounds like you are getting off to a good start on the restoration. As for the wood restoration you won't go wrong following ARJ'r suggestions.
Relatively speaking, we may be neighbors, I'm in Farmington Hills, MI. If I can be of assistance drop me a line. I don't have as much expierence as many of the others on this forum but then again you may be breaking new ground with your Royalite project.
Joe Brincat fixerjo@sbcglobal.net
Richp
Posts: 13
Joined: Wed May 30, 2007 5:24 am
Location: Sterling, MI
Contact:

Post by Richp »

Anreas, Thanks for the help! And yes I was talking about the gunwale, I learned something already! I have been around boats most of my life but never picked up on the proper termenalogy. I have even done a lot of mechanical work on large boats.
The repair on the gunwale you described is pretty much what I had in mind.
I just wanted to make sure I was going about it in the right way.
Also on the transom do you recemend that I replace the whole outer transom? or would just replacing the rotten portion be good?
Also any suggestions on floor (decking)? What was there before looked like some kind of peg board (rotten) with carpet on it. I know I have seen some wood thompsons with what looked to be maybe plywood with a type of linolium covering.

I feel pretty guilty about this boat. I bought it about 4 years ago. And fell in love with the thing! I ran it for the first 2 years. And knowing it needed attention on the third year put it in the garage. Well at the time I was working aprox 50 hours a week and commuting 186 miles round trip, so
I never got around to it. Eventually it ended up going through 2 hard winters outside tarped with no attention. So the damage it already had worsened. So now I have a lot more work to do.

Also (Andreas) You sent me some info on this boat 2 or 3 years ago and I
greatly apriciate that! With out your help I would never have known anything about this boat.

Joe, Well I guess we are neighbors more than you know. I grew up in the metro Detroit area. My last house there was in Westland. I know I will have some questions for you! The first would be a good source for marine
plywood. I do get down to the Detroit area from time to time, as I have a lot of family down there. I think my main obstacle on this project will be supplies, I am in a pretty rural area and there just isn't much avalible localy. Heck its a 14 mile round trip to the local hardware!

Hey thanks again guys! I know I will have many questions! I am trying to put together somewhat of a game plan now. I guess my first priority will be the 2 rot problems then I will start from the bottom and work my way up.
Thanks Rich
a j r
Posts: 661
Joined: Sat Jan 07, 2006 3:09 pm

Post by a j r »

Rich. Yup, I recall our communications from several years ago about this Thompson Royal-Craft boat.

I doubt there would have been carpet on the flooring originally. I have NO idea what may have been in it for a floor. Would it have had a floor from the factory???

As for the plywood on the transom, I don't know what the best action will be - replace the entire piece or splice in new wood where bad wood is removed??

Take lots of pictures along the way during your restoration. There are so very few of these boats that it will be great to document it.

Andreas
Image
Richp
Posts: 13
Joined: Wed May 30, 2007 5:24 am
Location: Sterling, MI
Contact:

Post by Richp »

Andreas, I think it must have had some sort of flooring down the center.
There are three beams going down the center. I am sure they have names (keelson?) haha. And there is old screw marks (2) about every foot or so
Looks like something was fastened there at one time. Plus the hull in the center between the beams is pretty flexible it doesn't seem like you should walk on it.

On the transom, I guess I will wait until I pull it apart to see if the damage is worse than it looks.

I sure wish there were a few more of these out there to compare to. I know of only one other. A fellow from New York if I recall. He had a Standard Royal-Craft 15 without the wood topsides. I was in communications with him via this website, but lost all the files after my computer crashed a year or so ago. Hopefully he will see this and jump in!

Also for anyone else interested, I have done a little research on the royalite material and there is still a product out there called royalite. I am not sure if its the same material but it sounds like it. They use it in small planes and a few brands of canoes. That royalite product is made of ABS plastic in all layers. In the canoes they can make repairs using abs type solvents to weld cracks and such. And they use heat (hair dryer) to fix creases and dents. I will do some more checking to see if its the same material. If so it may be useful down the road for someone else to know that theses hulls may be repairable.

I will post lots more pics and put the URL here so if anyone is interested they can see the before and after pics.

Again this is a great little boat. It is a lot of fun! It is lite and handles well
Its a real smooth riding boat because the hull is flexible. Only thing I hate about it is the motor is manual start! If I am out with the family and shutdown, I hate crawling over everyone to restart! haha.

Rich
JoeCB
Posts: 241
Joined: Fri Dec 30, 2005 5:17 pm
Location: Farmington Hills , MI

Post by JoeCB »

Rich, That's an interesting history on your boat. Not much different than many others I suspect. We ran my 57' Sea Lancer for a couple of years with what turned out to be some pretty questionable structural components before I finally got motivated to do the necessary repairs. In retrospect, I guess I'm lucky that the boat didnt end up at the bottom of Lake Huron.
As for sources for wood... Public Lumber Co. in Detroit (1-75 and 7 Mile Rd.) has about the best selection of marine plywood that I'm aware of. They also have a good selection of all other hardwoods, Maghonogy, white oak etc, that you might need. From my expierence their prices are reasonable. Now If you need much larger quantities of hardwoods or longer. thicker pieces say to rebuild a keel... we have Armstrong Millworks in Highland on M59 east of US 23.
Good luck on your project... we all expect to see your restored Thompson at next years rally!
Joe
Richp
Posts: 13
Joined: Wed May 30, 2007 5:24 am
Location: Sterling, MI
Contact:

Post by Richp »

Joe, Thanks for the info! I should be in the Detroit area in about 1 week.
And I will check them out.
Right now while I am waiting to get the lumber I need for repairs, I started striping and taking apart one of the seats. Some of the boards on the seat back are warped. In the past I have straightened out cupped boards on furniture (table tops) by applying moisture to the dry side and heat to the wet side. It seems to work pretty well. Only thing is on furniture I would seal the bottom of the table top right after it straitened and dried with whatever I was using for a finish. The question I have is, both sides of the seat back will be stained and varnished. I would like to stain everything at the same time or at least in stages (the whole seat at one time). Do you guys use some sort of sanding sealer before staining?
I see in other posts that most use a filler stain. I am not sure if you would use a sealer before the filler stain? I guess what I am trying to ask is what would be recommended to seal the wood so it won't dry out again and warp while I am working on the rest of the seat? Once I get things as straight as possible I would like to glue it back together and the finish sanding? I guess with humidity levels so high right now I don't have to worry to much about the wood drying out again. But any suggestions would be Greatly appreciated!

Rich
a j r
Posts: 661
Joined: Sat Jan 07, 2006 3:09 pm

Post by a j r »

By the way, I spent about 4 hours with Ted Thompson, Jr. at Cortland, NY in April. This is where the Thompson Royal-Craft boats were made. The hulls were actually molded by US Rubber in Rhode Island and then shipped to Cortland. At Thompson they "trimmed" them out.

Glenn Thompson, Ted's cousin, was the brainchild for this endeavor. But he departed almost as soon as it got going.

Andreas
Image
Richp
Posts: 13
Joined: Wed May 30, 2007 5:24 am
Location: Sterling, MI
Contact:

Post by Richp »

Andreas, Thats interesting! Seems like they may have been 20 or 30 years ahead of their time using the royalite hulls. The royalite seems pretty tough to me. There is a few scrapes and small gouges in mine, But what is really neat about the stuff is that it seems to have a memory because of the foam like core. A few years back I was trying to trailer the boat on a windy day alone!
And I hit the trailer sideways and put a nice dent in the hull. I was pretty upset about it, but by the time I got the boat home and it baked in the sun the
dent was completely gone! Its pretty neat stuff!
There are canoes made from royalite now as well as a similar material called
Royalex (?) something like that. It looks like it may be the same basic material. The company that makes it purchased the rights from Uniroyal and I believe that US Rubber became Uniroyal, so at the very least its probably a modern day version of the stuff.

By the way you guys do a great job with this site! Thanks for the hard work!

Rich
John Hart
Posts: 208
Joined: Sun Jan 29, 2006 7:26 pm

Post by John Hart »

The structural components of your boat are pretty interesting.... sort of a triple, triple inner keelson.....

That must make it a lot stronger than a typical boat of it's size....

John H.
Richp
Posts: 13
Joined: Wed May 30, 2007 5:24 am
Location: Sterling, MI
Contact:

Post by Richp »

Hi John, Yes it is pretty strong. I think it was probably neccesary because of
the plastic hull. Its about 1/2" thick and is 2 thin layers of hard plastic with a foamed plastic core. (5 layers according to an old brochure).
I have not pulled the keelson's apart yet, (found some rot on one) but they
appear to actually be 4 pieces each, a mahogany 1 by 3 laying horizontal on the hull and a 2 by 4 on top of that verticle (sort of a half I beam) and 2 oak
boards sandwiching that. My guess is without all of that the hull would bow out
of shape. When I pull them out I will probably pull the one at a time to be safe!

Image

Rich
a j r
Posts: 661
Joined: Sat Jan 07, 2006 3:09 pm

Post by a j r »

Very cool to see the details of the construction of this unique boat!

Andreas
Image
Richp
Posts: 13
Joined: Wed May 30, 2007 5:24 am
Location: Sterling, MI
Contact:

Post by Richp »

I am slowly making progress on the boat. I cut out the rotten wood in the gunwale. I picked up a plank of rough sawn white oak and cut the heart wood out of it and made my new piece for the gunwale. I just need to mill it down a bit more and it should be good to go.

Image

Image

Rich
Richp
Posts: 13
Joined: Wed May 30, 2007 5:24 am
Location: Sterling, MI
Contact:

Post by Richp »

I have been thinking about the gunwale repair I made in the last post. I used more of a miter joint than an actual scarf joint. I planned on joining it at both ends with glue and biscuits as well as screws. Would this be sufficient?
Or should I redo it with an actual scarf like you would do on plywood?

Thanks!
Rich
Post Reply